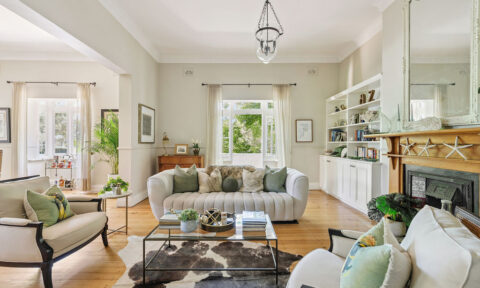
Located in the Melbourne suburb of Armadale, this 1960’s two-bedroom apartment got the budget makeover treatment recently with amazing results. Carried out almost entirely by the owners Alannah and Dave, the project makes impressive use of paint as a key renovating tool.
“Our apartment isn’t big, and had previously been painted all in white, so we were nervous about introducing any colour,” said Dave, who consulted with Haymes colour stylist Wendy Rennie on how to choose colours for small spaces. “We are also planning to rent the apartment out in the years to come, and didn’t want anything too bold. Wendy helped us choose some great tones that were fairly neutral, but so much more effective than the ‘off-white’ colour that was in the apartment before.”
Swapping out the stark white for a variety of soft greys and black, the renovation proves the quiet power of the colourful neutral. “Just because you like a colour doesn’t mean it’s the right choice, there are a lot of preconceived ideas about colours and we definitely had our fair share. When Wendy initially suggested black for the kitchen and a neutral green tone for the lounge room we were apprehensive. But the results speak for themselves, and I can’t believe how different it feels now. We wish we had discovered colour stylists years ago!” says Dave.
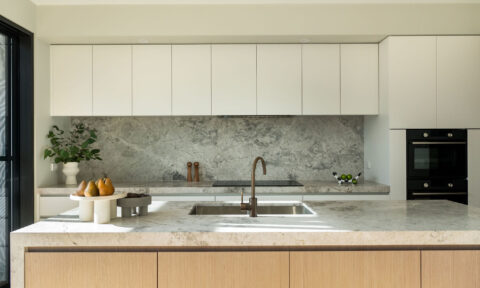
Paint certainly made all the difference in the kitchen, with the couple giving the space a cosmetic makeover rather than a complete overhaul. “The kitchen was so tired, and very 60’s. It had beige lino on the floor, shiny beige doorknobs, beige curtains and old beige cabinetry,” says Allanah. The space was transformed with a lick of Intrigue, the brand’s darkest shade of black.
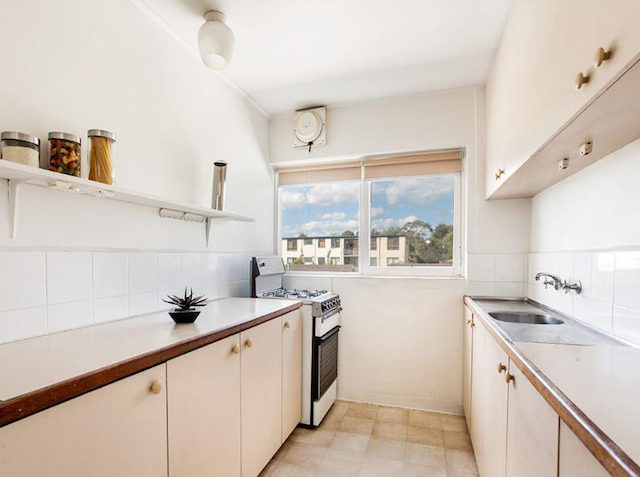
“When Wendy suggested we paint the cupboards black, we were initially resistant, and thought it would look dark, and close the room in. But in the end, we figured that she was the expert and so we may as well go along with her suggestion. Ultimately, we absolutely love it. It has completely transformed our kitchen, all for the cost of a few tins of paint. It’s unbelievable,” says Alannah who replaced the kitchen cupboard handles and door knobs too.
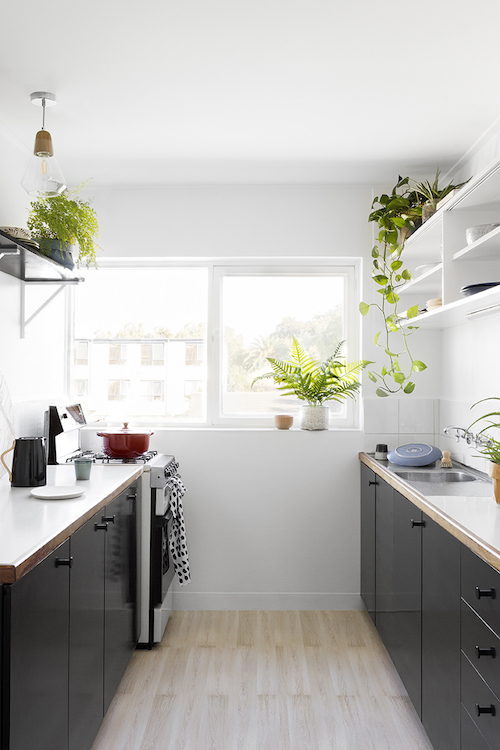
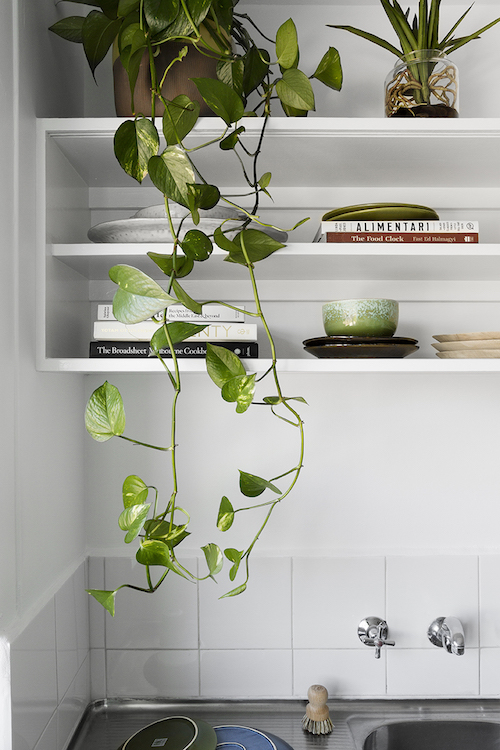
Wendy also suggested bringing in as many contemporary aspects as possible – the open shelving was a clever move. “Originally the beige cabinetry went right up to the ceiling, we decided to pull off the doors, and bring back the original 60’s shelving that was there before the cabinetry would have gone in. Taking off the cabinets and painting the shelving white instantly lifted the space whilst opening it up more,” says Alannah.
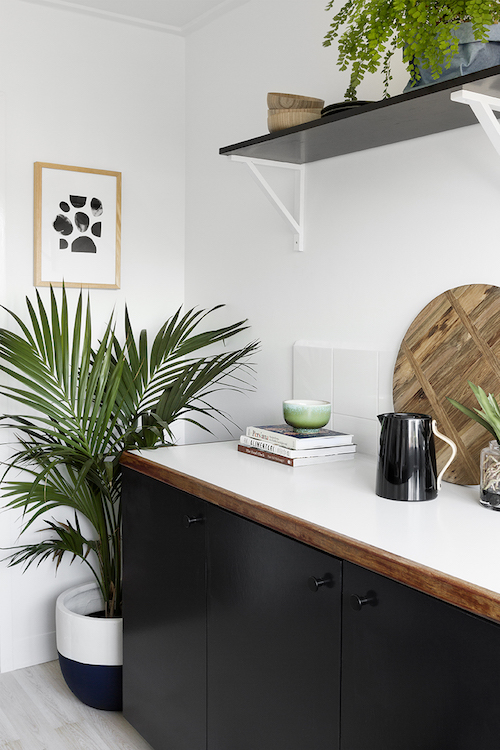
The couple’s DIY budget didn’t extend to a marble or stone kitchen benchtop replacement, but they achieved amazing results with Haymes Ultimate Epoxy in Aura. “The Epoxy was magic stuff – super easy to apply and gave us a totally different feel in the kitchen. The bench top is no longer salmon-coloured!” says Dave.
The kitchen floor presented a challenge as the couple struggled to find something that could easily be installed without an expert. “The flooring was quite a challenge, there are lots of apparently DIY products on the market, but when you actually start doing your research, most of them are really hard to install by yourself and can so easily go wrong,” says Alannah. The original beige lino was replaced with a product from Pickawall. “We chose a blonde oak surface for the kitchen floor, as the perfect complement to the cabinetry. This product is such a good low-fuss, low-cost flooring option,” says Alannah.
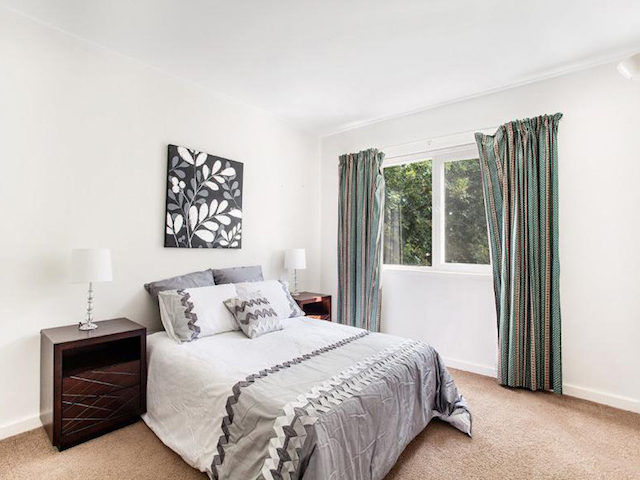
The bedroom makeover primarily consisted of fresh paint – Haymes Feather Grey, a moody grey. “We also updated the hideous old curtains that used to be the master bedroom, and replaced some of the old light fittings, though we got a licensed electrician in to do the electrical work,” says Alannah.

Of the project, Dave has plenty of advice to impart to would-be renovators. “Allow plenty of time, you want to be able to get the right quality finish so don’t put yourself under time restraints. Anything can happen! Also, do your research and think creatively about possible products. For us, the benchtop and flooring products were not common ideas we had come across but turned out to be brilliant and super low cost.”
“Despite the hard work, the overall impact has been huge, and we are so pleased with how it’s turned out. In the end, our finished product was worth it, we love what we have been able to do with the space, with a small budget,” says Dave.
Photography: Martina Gemmola | Styling: Ruth Welsby
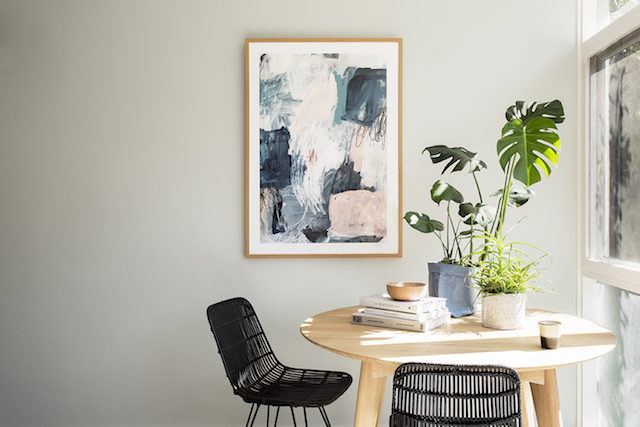
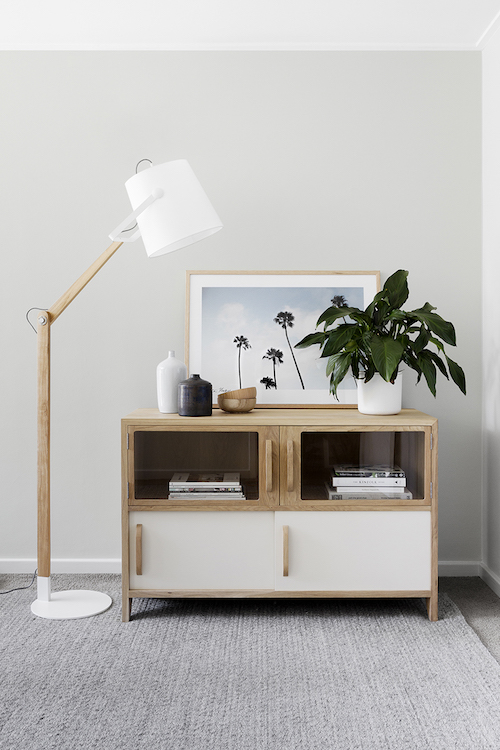
For more paint ideas
Comments
Looks great! I’m particularly impressed by the kitchen. Would you mind sharing details of the carpet you used too please?
Just wondering if you found the benchtop marked with water- we have recently applied the Haynes Epoxy to our bench top (2 coats) but even wiping with a damp sponge has left marks.