Sponsored by Feast Watson
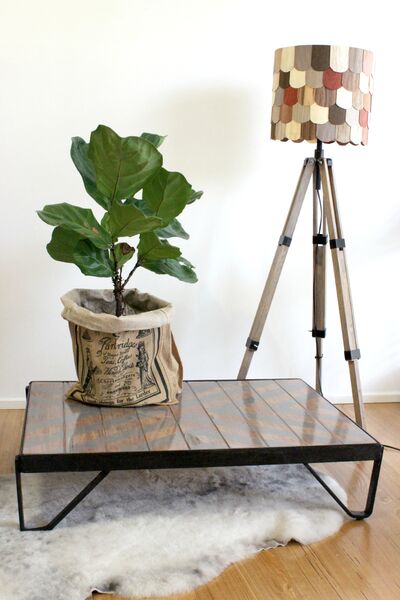
This beautiful reclaimed pallet coffee table and tripod lamp is by Tina Vanspall of Vintage Movement. A former art dealer, Tina is the go-to girl for thrifty vintage buys and easy DIY how-to’s. Find out how she did her latest makeover:

Products:
- Feast Watson Liming White Stain and Varnish (Gloss finish)
- Feast Watson Liming White Stain and Varnish tinted to Danish Dust (Satin finish)
- Feast Watson Clear Varnish (Gloss)
- Dulux Metal Shield Enamel in Black
Planning:
- Choose something in need of refreshing with a good bone structure. When working with timber finishes and wood care products consider the wood grain and how it will appear once treated. Feel free to test your products on a piece of scrap wood to begin, as this will give the best idea of the number of coats required to achieve your desired effect.
- Take inspiration from the kind of style you love and there will always be incentive to overcome any potential obstacles faced along the way. Rustic, modern Scandi style homes were the inspiration for this project.
Preparation:
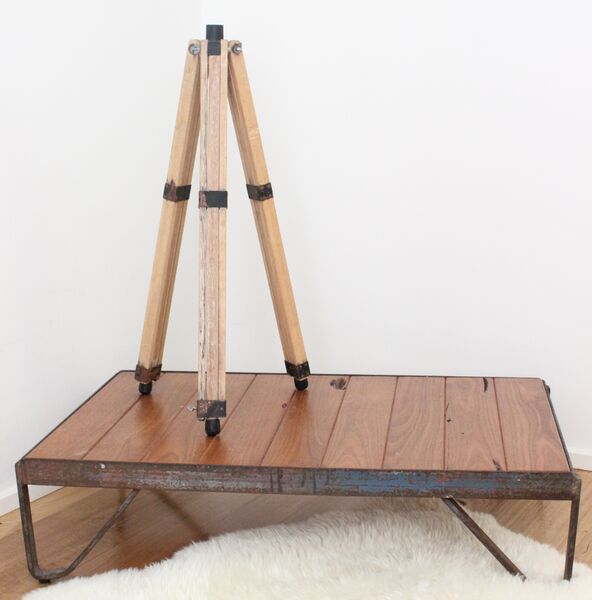
The table
- Prepare your surface by sanding, ready for painting.
- Block out and protect the table top by using painter’s tape to tape around your table.
- Make sure all dust is removed prior to coating the furniture.
The lamp
- Sand the base entirely and unscrew the nuts and bolts at the top of the tripod, then remove the legs for painting.
- Create a template for your veneer cutouts by cutting out a rectangle with a curved half-moon edge on one side approximately two inches wide and three inches long.
- Cut your veneer clams/shingles.
Achieving your vision:
The table
- Use Dulux Metalshield in Black (Satin) to paint your table base.
- Leave to dry overnight before adding a second coat and leave to completely dry for one-to-two days.
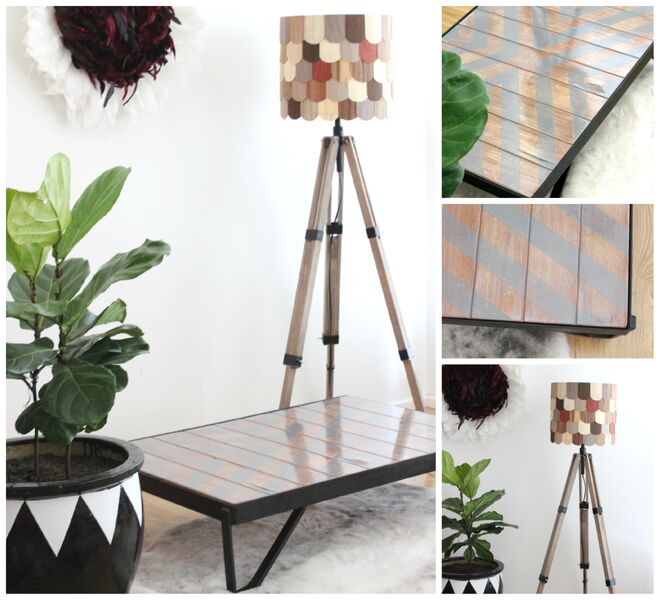
- To create the patterned table top, start by lime washing the timber using Feast Watson Liming White Stain and Varnish (Gloss). The number of layers depends on your timber and the effect you want to achieve but use at least three-to-five coats. I used five coats, spaced out by no less than three hours each time. You could also use Feast Watson Liming White to lime wash your table top – you may only need one or two coats of this product to reach desired effect.
- Once your liming layers have dried, lightly sand to enhance the milky weathered look.
- To create the chevron pattern you need to create a block out stencil using painter’s tape, placed at points across the table top. You can do this by eye or by measuring and taping at precise points. The easiest place to start, is to make a large crisscross across the table by taping from one corner to the other on both sides. This splits the surface into four blank triangle sections and you then need to create additional three evenly spaced graduating triangles within each of the four blank sections. To do this simply tape each section with triangles as though you are taping out a parquetry style flooring pattern. Once you have blocked out each section with taped triangles remove every other triangle starting with the first. Make sure to leave the large cross taped firmly in place. I used two-inch painter’s tape for this process.
- Apply Feast Watson Liming White Stain and Varnish in Danish Dust (Satin) to the blank spaces on the table. I used two coats with three-to-four hour gaps between coats.
- Once the Liming White in Danish Dust has dried carefully peel back the painter’s tape.
- To enhance the rustic look you can sand the top then finish with a coat of Feast Watson Clear Varnish (Gloss). Using a painter’s brush, apply the varnish in long even strokes in the same direction. Leave to dry for 24 hours.
The lamp
- Use painter’s tape to block out the surrounding timber near the hardware and apply two coats of Dulux Metalshield in black leaving five hours drying time between coats.
- Use Feast Watson Liming White in Danish Dust and apply two coats to the timber base.
- Leave at least two hours drying time between each coat.
- Once dry, lightly sand and scuff the timber to create a rustic look.
- When the legs are completely dry reassemble the tripod. The tripod is now ready to be wired by an electrician at your local lighting repair store.
- Choose a few pieces of the veneer off cuts in different colours. Tint a selection with a coat of Feast Watson stain leaving the rest bare. Leave to dry.
“Find something with good bones and use quality paints, finishes, fixtures and fittings. Take your time and allow sufficient dry time between coats – the final finish will be worth the wait!” – Tina Vanspall
NB: Always test colour and stains on an off-cut or inconspicuous area of your piece prior to coating the whole to ensure you’re happy with the colour.
To find out more about Feast Watson products and their application, visit their website and for inspiration, check out the Feast Watson Instagram.